Comparing window replacement quotes can feel like deciphering different languages, with each contractor presenting their offer in a unique way. The concise answer to navigating this complexity is to standardize your request, meticulously document your existing conditions and desired outcomes, and then use a structured framework to compare proposals against your defined scope, rather than just the bottom-line price. This guide will walk you through a systematic approach, empowering you to make informed decisions, control your project's trajectory, and ensure a successful outcome.
We'll begin by helping you define your project's scope clearly, from inventorying each window opening to specifying installation methods and desired finished conditions. Next, we'll provide a master checklist to ensure every quote you receive is comprehensive and comparable. You'll learn how to use a structured comparison framework, identify common red flags, and review a practical example. Finally, we'll cover essential steps for project closeout and address frequently asked questions, ensuring you're prepared from start to finish.
The Foundation: Why a Detailed Scope Matters
Before you even request a single quote, defining your project's scope is paramount. A clear, detailed scope acts as your blueprint, ensuring all contractors bid on the exact same work and materials. Without this foundation, you risk receiving wildly disparate proposals that are impossible to compare accurately, leading to confusion, unexpected costs, and potential disputes down the line. Your detailed scope is your best tool for ensuring transparency and achieving your desired results.
Local Regulations and Professional Verification
Home improvement projects, including window replacement, are often subject to local building codes, permitting requirements, and specific licensing rules. These regulations can vary significantly by city, county, and state. It is advisable to verify these requirements with your local building department before starting any project. For instance, some areas may require permits for structural alterations or specific energy efficiency ratings for new windows. Additionally, contractor licensing and insurance requirements are typically governed at the state or local level. Always confirm that any contractor you consider is properly licensed and insured for work in your area. This due diligence can help protect you from potential liabilities and ensure your project adheres to established safety and quality standards.
Your Role in Defining the Project
As the homeowner, you are the primary stakeholder in this project, and your vision should drive the scope. While contractors are experts in their field, they rely on your input to understand your needs, preferences, and expectations. Take the time to consider what you want to achieve with your new windows: improved energy efficiency, enhanced aesthetics, better sound insulation, increased security, or a combination of these. Documenting these goals will help you communicate them effectively to potential contractors. Your active participation in defining the scope ensures that the project aligns with your priorities and helps prevent misunderstandings. For more general guidance on planning home projects, you might find our collection of homeowner guides helpful.
Step 1: Inventory Each Opening and Its Specific Needs
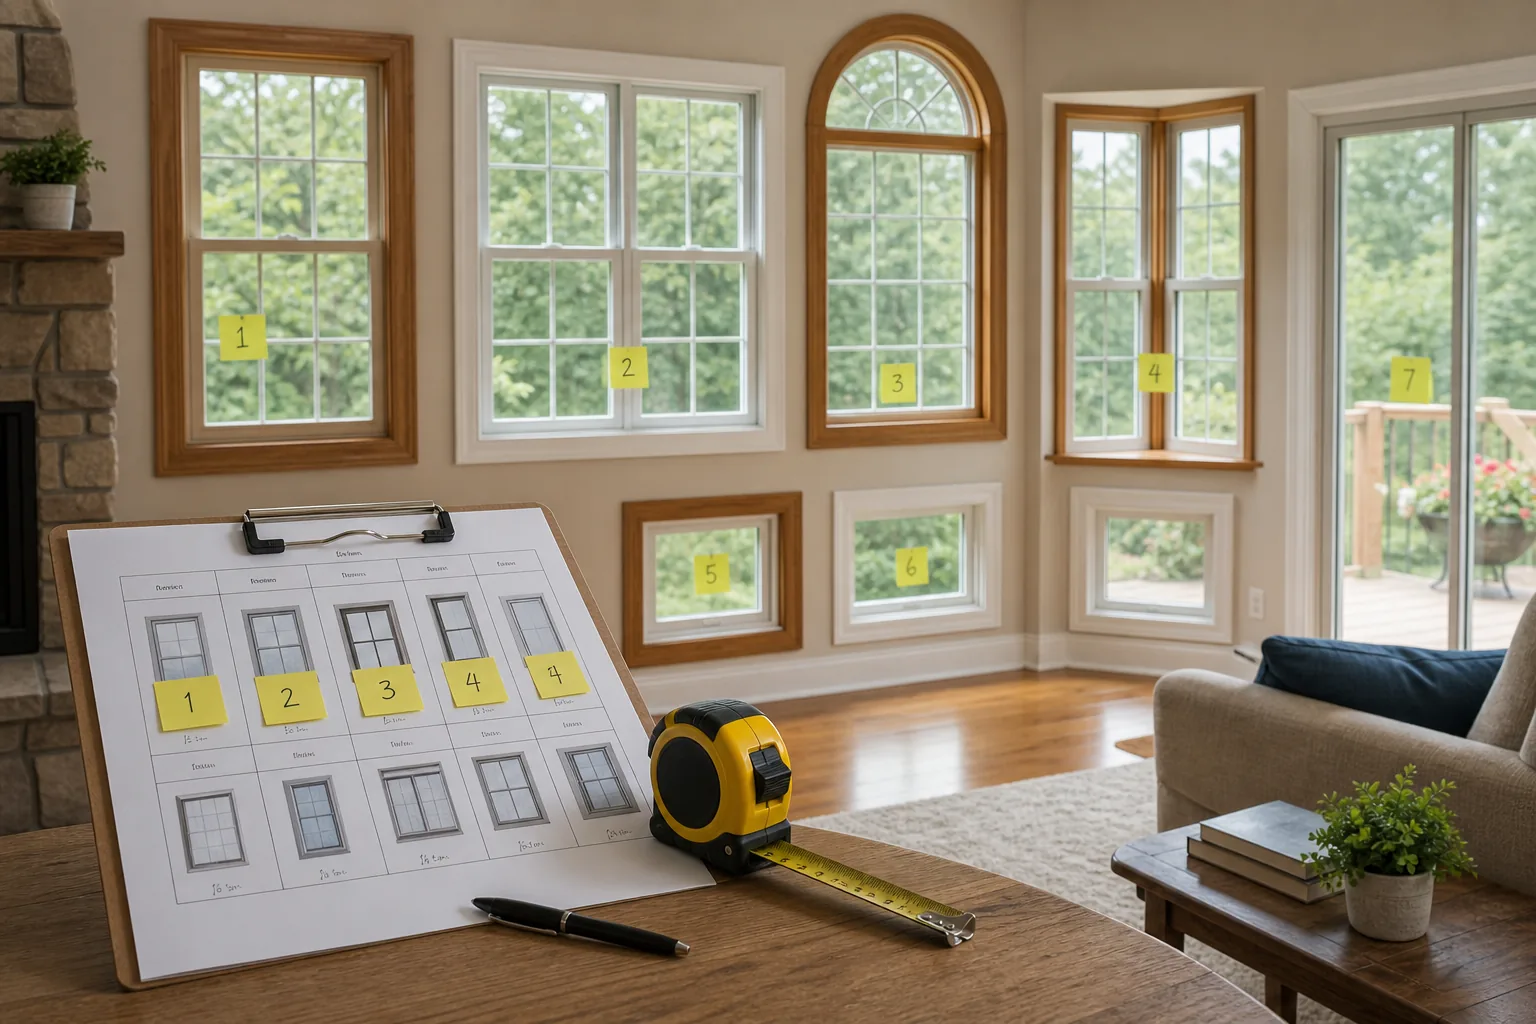
The first concrete step in defining your project scope is to meticulously inventory every window opening you intend to replace. Each opening might have unique characteristics that influence the type of window, installation method, and associated costs. Don't assume all windows are the same; even within a single home, variations in size, condition of the surrounding structure, and desired functionality can lead to different requirements.
Window Types and Operating Styles
Windows come in a wide array of types and operating styles, each offering different aesthetics, ventilation options, and levels of energy efficiency. Common types include double-hung (both sashes open), casement (crank open outward), awning (hinged at the top, open outward), slider (slide horizontally), picture (fixed, non-opening), and bay or bow windows (project outward from the wall). For each opening, consider which style best suits the room's function, ventilation needs, and your aesthetic preferences. For example, a casement window might be ideal for hard-to-reach areas like over a kitchen sink, while a large picture window could maximize a scenic view. Clearly specifying the desired type and operating style for each window ensures contractors bid on the correct products.
Material Considerations
The frame material of your new windows significantly impacts their durability, maintenance requirements, energy performance, and appearance. Common options include vinyl, wood, fiberglass, and aluminum. Vinyl windows are often a popular choice due to their affordability, low maintenance, and good insulation properties. Wood windows offer a classic aesthetic and excellent insulation but typically require more maintenance. Fiberglass frames are known for their strength, durability, and stability, resisting expansion and contraction. Aluminum frames are strong and thin, allowing for larger glass areas, but can be less energy-efficient unless thermally broken. Discuss the pros and cons of each material with contractors in relation to your home's climate, architectural style, and budget. Your choice of material should be clearly stated for each window in your project scope.
Performance Ratings (U-factor, SHGC, VT, AL)
Understanding window performance ratings is crucial for making informed decisions, especially if energy efficiency is a priority. These ratings are typically provided by the National Fenestration Rating Council (NFRC) and are found on labels affixed to windows. Key ratings include:
- U-factor: Measures how well a window prevents heat from escaping. Lower U-factors indicate better insulation.
- Solar Heat Gain Coefficient (SHGC): Measures how much solar radiation passes through a window and becomes heat. Lower SHGC values are desirable in hot climates to reduce cooling loads, while higher values might be preferred in cold climates for passive solar heating.
- Visible Transmittance (VT): Measures how much visible light passes through a window. Higher VT means more natural light.
- Air Leakage (AL): Measures how much air passes through the window assembly. Lower AL values indicate less draftiness and better energy performance.
Step 2: Name the Installation Method
The installation method chosen for your window replacement project is a critical detail that affects not only the cost but also the structural integrity, energy performance, and long-term durability of your new windows. There are generally two primary approaches: insert replacement and full-frame replacement. Understanding the differences and specifying your preferred method, or at least the conditions under which each would be acceptable, is essential for accurate quoting.

Insert vs. Full-Frame Replacement
An insert replacement, sometimes called a "pocket replacement," involves installing a new window unit directly into the existing window frame. This method is generally less invasive, quicker, and often more affordable because it preserves the existing trim, siding, and interior finishes. However, it is only suitable if the existing window frame, sill, and surrounding components are structurally sound and free from rot, moisture damage, or significant deterioration. The primary drawback is a slight reduction in glass area, as the new frame fits within the old one.
A full-frame replacement, also known as a "new construction" installation, involves removing the entire existing window unit, including the frame, sashes, trim, and sometimes even portions of the surrounding wall materials down to the rough opening. This method allows for a complete inspection and repair of the rough opening, proper flashing, and insulation, which can significantly improve energy efficiency and prevent future moisture issues. It also allows for potential changes in window size or type. While more labor-intensive and costly, it is often the recommended approach when the existing frame is compromised or when maximizing energy performance and longevity are top priorities. The U.S. Department of Energy provides detailed guidance on window installation practices, including considerations for full-frame replacement to ensure proper air sealing and insulation around the window opening [U.S. Department of Energy].
Addressing Structural Issues
Regardless of the chosen installation method, it is crucial to address any potential structural issues around the window openings. This includes identifying and repairing rot, water damage, insect infestation, or compromised framing. If these issues are not addressed, they can undermine the performance and longevity of your new windows, potentially leading to costly repairs down the line. Your project scope should explicitly state that contractors are to inspect for such issues and include provisions for their repair in their proposals. This might involve a clause for "discovery work" where additional costs for unforeseen structural repairs are outlined, or a requirement for contractors to provide an estimate for potential repairs based on their initial assessment. Clear communication about how these issues will be handled is vital.
Lead-Safe Renovation Practices
If your home was built before 1978, there is a possibility that lead-based paint is present on or around your existing windows. Disturbing lead-based paint during renovation activities can create hazardous lead dust and chips, posing serious health risks, especially to children and pregnant women. The Environmental Protection Agency (EPA) mandates specific lead-safe renovation, repair, and painting (RRP) practices for contractors working in homes built before 1978 [EPA RRP Program for Consumers]. Your project scope should explicitly inquire about a contractor's lead-safe certification and their proposed methods for containing, cleaning up, and disposing of lead-contaminated materials if applicable. Homeowners should be aware of the potential for lead exposure and take steps to protect their families [EPA Protect Your Family].
Step 3: Define the Finished Condition
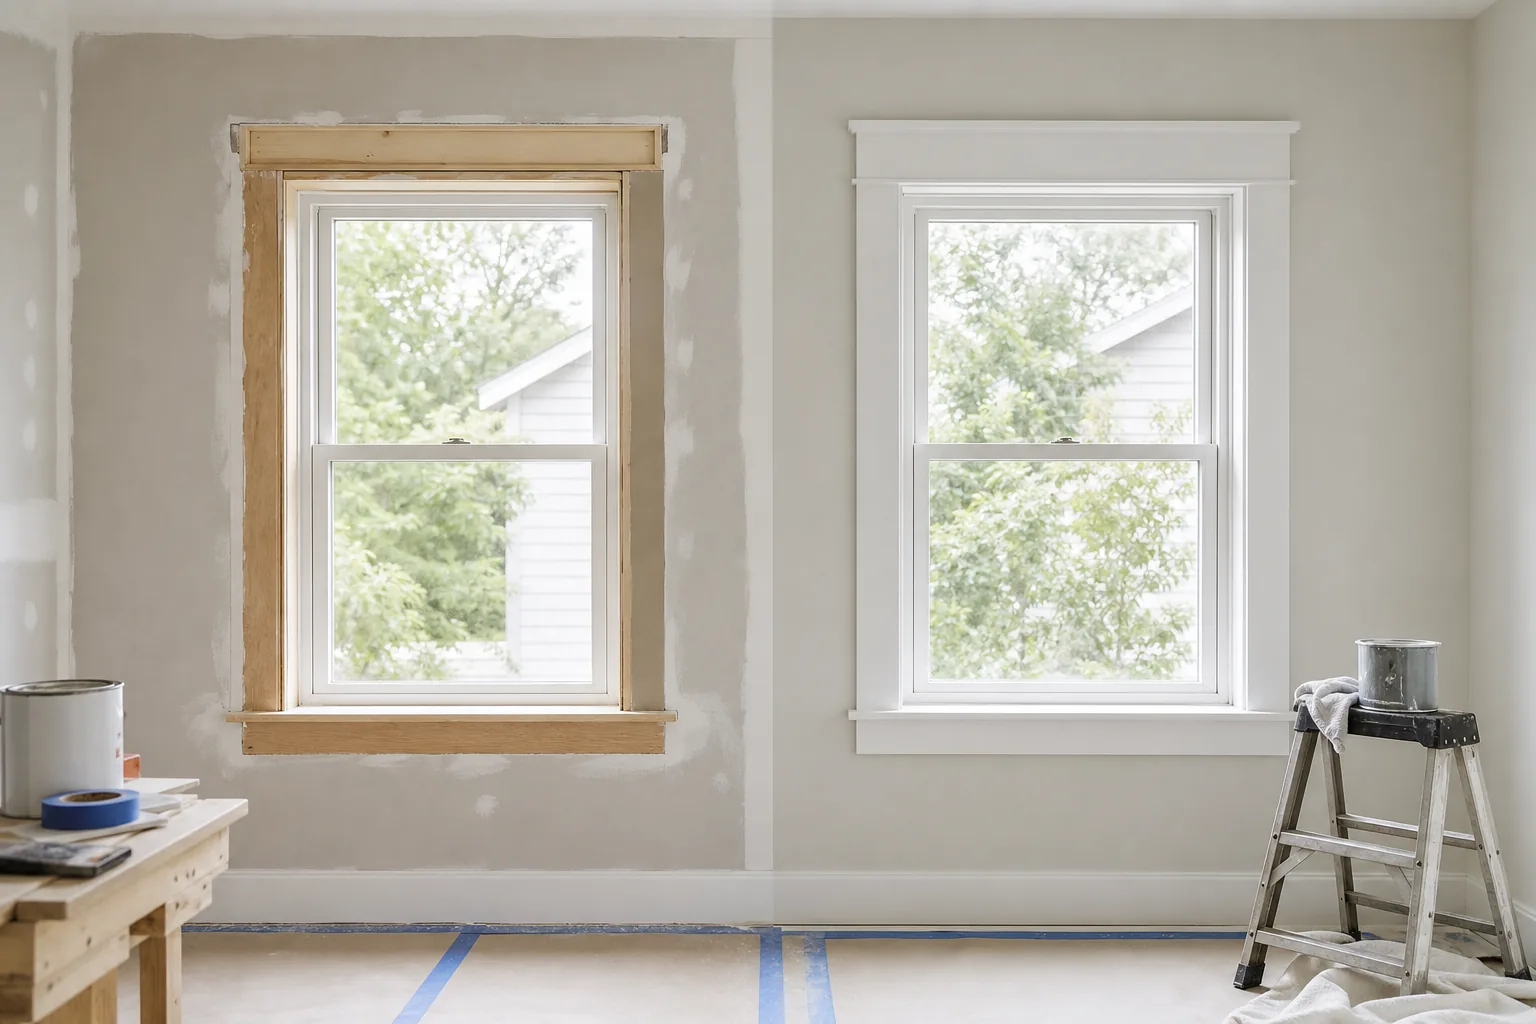
The "finished condition" refers to how the project site will look and function once the window replacement is complete. This includes everything from the interior trim and paint to the exterior siding and landscaping. Overlooking these details can lead to unexpected expenses, an unfinished appearance, or a need for additional work from other trades. Clearly defining the finished condition ensures that contractors account for all necessary steps to leave your home in a complete and satisfactory state.
Interior Trim and Paint
When windows are replaced, especially with a full-frame installation, the existing interior trim around the windows may need to be removed or replaced. Your scope should specify whether you expect the contractor to reinstall existing trim, install new trim (and if so, what style and material), or if this work will be handled by another party. Similarly, paint touch-ups or full repainting of the window casings and surrounding walls are often necessary. Clarify whether painting is included in the contractor's scope, to what extent (e.g., primer and one coat, or full finish coats), and who is responsible for color matching or selection. Ambiguity here can lead to an unfinished look or additional costs after the main project is complete.
Exterior Siding, Flashing, and Sealants
The exterior finish around your new windows is just as important as the interior, both for aesthetics and for protecting your home from the elements. The scope should detail how the exterior siding or cladding will be handled. Will it be cut back and reinstalled neatly, or will new trim pieces be used? Proper flashing and sealing are critical to prevent water intrusion around the new windows. Specify that flashing should be installed according to manufacturer recommendations and local building codes. Detail the type of exterior sealants to be used (e.g., silicone, polyurethane) and their color. A well-defined exterior finish ensures weather-tightness and maintains your home's curb appeal. The EPA offers guidance on moisture control, which is highly relevant to proper exterior sealing [EPA Moisture Control Guidance].
Debris Removal and Site Cleanup
A clean worksite is a sign of a professional contractor and contributes to a positive project experience. Your scope should explicitly state expectations for debris removal and site cleanup. This includes the proper disposal of old windows, frames, and any construction waste. Specify daily cleanup routines, protection of surrounding landscaping, and a final thorough cleaning of the work areas, both inside and out. Clarifying these details upfront helps prevent misunderstandings about who is responsible for what, ensuring your property is left tidy and safe once the project is complete.
Crafting Your Request for Proposal (RFP) – The Master Checklist
Once you've thoroughly defined your project's scope, the next step is to compile this information into a comprehensive Request for Proposal (RFP) document. This document will be given to every contractor you invite to bid, ensuring they all have the same information and can provide comparable quotes. A well-structured RFP is your most powerful tool for comparing offers without losing critical details. It minimizes assumptions and forces contractors to be specific in their proposals.
Essential Elements for Every Quote
Your RFP should request that each contractor's proposal include, at minimum, the following detailed components:
- Company Information: Full legal name, address, phone, email, website.
- Licensing and Insurance: Proof of current state/local contractor license, general liability insurance, and workers' compensation insurance.
- Project Overview: A clear summary of the work to be performed, referencing your detailed scope.
- Detailed Scope of Work:
- Window Schedule: A list of each window opening, specifying:
- Location (e.g., "Living Room Front," "Bedroom 2 North").
- Dimensions (width x height, rough opening or daylight opening).
- Desired window type and operating style (e.g., "Double-hung," "Casement").
- Frame material (e.g., "Vinyl," "Fiberglass").
- Glass package specifications (e.g., "Low-E, Argon-filled, double-pane").
- Performance ratings (U-factor, SHGC, VT, AL) to meet or exceed.
- Color (interior and exterior).
- Any specific hardware, grilles, or screens.
- Installation Method: Clearly state whether insert or full-frame replacement is proposed for each window, with justification.
- Structural Repairs: Outline how potential structural issues will be identified and addressed, including any associated costs or procedures for change orders.
- Lead-Safe Practices: If applicable (home built before 1978), detail lead-safe work practices, certifications, and disposal methods.
- Interior Finishes: Specify trim removal/replacement, material, style, and painting responsibilities.
- Exterior Finishes: Detail siding/cladding handling, flashing methods, sealant types and colors.
- Debris Removal: Outline cleanup procedures, including disposal of old windows and construction waste.
- Window Schedule: A list of each window opening, specifying:
- Materials and Products: Specific brands, models, and product numbers for all proposed windows and associated materials (e.g., sealants, insulation).
- Timeline: Estimated start and completion dates, including a project schedule with key milestones.
- Payment Schedule: A clear breakdown of payment terms, including deposit amount, progress payments, and final payment conditions.
- Warranty Information: Details on both the window manufacturer's warranty and the contractor's labor warranty, including duration and what is covered.
- References: A list of recent, relevant customer references.
- Exclusions: Any work or materials specifically NOT included in the proposal.
- Validity Period: How long the quoted price is guaranteed.
The Comparison Framework: A Structured Approach
Once you've received multiple detailed quotes based on your comprehensive RFP, the real work of comparison begins. Resist the urge to simply pick the lowest price. A structured comparison framework allows you to evaluate each proposal holistically, ensuring you're getting the best value and the right fit for your project, not just the cheapest option.
Beyond the Bottom Line
While cost is undoubtedly a significant factor, focusing solely on the bottom-line price can be misleading. A lower price might indicate a less comprehensive scope, lower-quality materials, or an inexperienced contractor. Instead, evaluate each quote against your defined scope of work. Does it include all the specific window types, materials, installation methods, and finished conditions you requested? Are the proposed products meeting your desired performance ratings? Look for discrepancies in what is included versus excluded. A slightly higher quote that fully aligns with your detailed scope and offers superior materials or warranties may represent a better long-term value. Consider using a renovation budget calculator to help you understand the full financial picture beyond just the contractor's bid.
Contractor Credentials and Communication
The quality of the contractor performing the work is as important as the quality of the windows themselves. Beyond verifying licenses and insurance, consider the contractor's reputation and communication style.
- References: Contact the provided references and ask about their experience with the contractor, including project adherence to schedule and budget, quality of work, and responsiveness to issues.
- Experience: Inquire about their experience with window replacement projects specifically, and with homes similar to yours.
- Communication: Evaluate how responsive and clear the contractor has been throughout the quoting process. Do they answer your questions thoroughly? Are they professional and easy to communicate with? Good communication is often a predictor of a smoother project.
- Certifications: Ask about any manufacturer certifications they hold for the window brands they propose, which can indicate specialized training.
Payment Schedules and Warranty Details
Carefully review the proposed payment schedule. A reasonable schedule typically involves a modest deposit (often 10-30%), progress payments tied to specific project milestones (e.g., material delivery, completion of installation), and a final payment upon satisfactory completion of all work. Be wary of contractors who demand a large upfront payment or full payment before work begins. Also, scrutinize the warranty information. There are usually two types: the manufacturer's warranty on the windows themselves (glass, frame, hardware) and the contractor's warranty on their labor and installation. Understand the duration of each, what specific issues are covered, and the process for making a claim. A strong warranty provides peace of mind and protection for your investment.
Red Flags to Watch For During the Process
As you navigate the process of soliciting and comparing quotes, being aware of potential red flags can help you avoid problematic contractors and protect your investment. Trust your instincts; if something feels off, it likely is. Identifying these warning signs early can save you significant headaches and financial losses.
Unsolicited Offers and High-Pressure Tactics
Be cautious of contractors who show up unannounced at your door, make unsolicited phone calls, or use aggressive sales tactics. High-pressure sales pitches, such as "today-only" discounts or claims of limited availability, are often designed to rush you into a decision before you've had time to properly evaluate the offer or compare it with others. Reputable contractors typically rely on referrals and established marketing channels, allowing homeowners ample time to consider their options. The Federal Trade Commission (FTC) provides guidance on how to avoid home improvement scams, emphasizing caution with unsolicited offers and high-pressure sales [FTC How to Avoid Home Improvement Scams].
Vague Contracts and Missing Details
A significant red flag is a contract or quote that lacks specific details. If a proposal doesn't clearly outline the scope of work, materials, installation methods, payment schedule, or warranty information, it leaves too much open to interpretation and potential disputes. A vague contract might be a deliberate attempt to cut corners later or charge extra for "unforeseen" work that should have been included. Insist on a detailed, written contract that incorporates all the elements from your RFP checklist. If a contractor is unwilling to provide specifics in writing, it's a strong indication to look elsewhere.
Unrealistic Promises
Be skeptical of contractors who make promises that seem too good to be true, such as drastically lower prices than competitors for the same scope of work, impossibly fast completion times, or guarantees of extreme energy savings without proper assessment. While contractors should be optimistic, overly ambitious or unsubstantiated claims can be a sign of inexperience or an attempt to mislead. A reputable contractor will provide realistic expectations regarding cost, timeline, and potential benefits.
Worked Example: Comparing Two Hypothetical Quotes
Let's imagine you've requested quotes for replacing five double-hung windows in your home, specifying vinyl frames, Low-E argon-filled glass, and a full-frame installation due to suspected frame rot. You also requested new interior trim and exterior sealing.
Quote A: "Standard Window Replacement"
This quote lists "5 Vinyl Double-Hung Windows" and a total price. It mentions "professional installation" and "basic cleanup." The glass package is described as "energy-efficient." The warranty section simply states "manufacturer's warranty applies." There's no mention of specific U-factor or SHGC, installation method (insert vs. full-frame), how existing trim will be handled, or exterior flashing details. The payment schedule asks for 50% upfront.
Quote B: "Comprehensive Window Upgrade"
This quote provides a detailed breakdown for each of the five windows, specifying "Brand X, Model Y Vinyl Double-Hung, Low-E 366, Argon-filled, U-factor 0.27, SHGC 0.23." It explicitly states "full-frame removal and installation for all openings, including inspection for and repair of minor structural rot (up to $Z value per opening, additional costs for major repairs outlined in change order process)." It includes "new 3.5-inch colonial style interior trim, primed and ready for paint," and "exterior flashing per manufacturer specifications, sealed with Brand A polyurethane sealant, color matched to siding." The quote details daily site cleanup and disposal of all old materials. The payment schedule is 20% deposit, 40% upon window delivery, 40% upon completion and final walkthrough. It includes a 10-year labor warranty from the contractor, in addition to the manufacturer's lifetime product warranty.
The Comparison
While Quote A might appear cheaper at first glance, Quote B is clearly superior in its detail and alignment with your RFP. Quote A's vagueness on installation method, glass performance, and finished conditions means you're likely to encounter hidden costs or an unfinished project. The 50% upfront payment is also a concern. Quote B, though potentially higher in initial cost, provides transparency, addresses potential issues like structural rot, and clearly defines the complete scope of work, including interior and exterior finishes. The detailed warranty and phased payment schedule offer greater protection. Choosing Quote B, despite a potentially higher initial figure, provides a much clearer understanding of what you're paying for and a higher likelihood of a satisfactory outcome without unexpected surprises.
Project Closeout: Ensuring Satisfaction and Documentation
The project isn't truly complete until you've conducted a thorough closeout. This final phase is crucial for ensuring all work meets your expectations, addressing any remaining issues, and securing important documentation for future reference. A well-managed closeout protects your investment and provides peace of mind.
Final Walkthrough and Punch List
Before making the final payment, conduct a comprehensive final walkthrough with your contractor. Inspect every new window, both inside and out. Check for proper operation (opening, closing, locking), ensure all seals are tight, and verify that interior and exterior finishes match the agreed-upon scope. Look for any damage, debris, or unfinished work. Create a "punch list" of any items that need correction or completion. Agree on a timeline for these items to be addressed. Only make your final payment once all punch list items have been satisfactorily resolved.
Warranty Registration and Documentation
Upon project completion, ensure you receive all necessary documentation. This typically includes:
- Copies of all contracts, change orders, and invoices.
- Manufacturer's warranty information for the windows, including registration instructions.
- The contractor's labor warranty.
- Any product care and maintenance instructions.
Frequently Asked Questions (FAQs)
Q1: How many quotes should I get for window replacement?
It is generally advisable to obtain at least three detailed quotes from different reputable contractors. This allows you to compare pricing, proposed materials, installation methods, and contractor professionalism, ensuring you have a good basis for making an informed decision.
Q2: What should I do if quotes vary significantly in price?
Significant price variations often indicate differences in scope, materials, or installation methods. Use your detailed RFP and comparison framework to identify these discrepancies. Don't assume the lowest quote is the best deal; it might be missing crucial elements that you'll end up paying for later.
Q3: Can I negotiate the price with contractors?
Negotiation is often possible, especially if you have multiple competitive bids. You might ask contractors to match a competitor's price for a comparable scope, or inquire about potential cost savings if you adjust certain aspects of the project, such as specific window features or timing.
Q4: What if a contractor finds unexpected issues during installation?
Your contract should include a clear process for handling unforeseen issues, often called a "change order" procedure. This typically involves the contractor notifying you, explaining the issue and proposed solution, and providing a written estimate for additional costs, which you must approve before work proceeds.
Q5: How important are energy efficiency ratings for windows?
Energy efficiency ratings (U-factor, SHGC, etc.) are very important, particularly for long-term comfort and utility savings. Windows are a significant source of heat loss or gain. Choosing windows with appropriate ratings for your climate can lead to noticeable reductions in heating and cooling costs over time.
Q6: Should I be present during the quoting process?
Yes, it is highly recommended to be present during initial consultations and measurements. This allows you to ask questions, clarify your needs directly with the contractor, and ensure they fully understand your project scope. It also helps you assess their communication style and professionalism.
This guide organizes a project conversation. It is not engineering, legal, code or trade advice. Property conditions and local requirements must be verified by qualified professionals.