Replacing your home's siding is a significant investment, one that goes far beyond simply changing the exterior aesthetic. While the visual appeal of new siding is often the primary motivator, a truly successful project hinges on the integrity of the entire "wall system" beneath the surface. Many homeowners focus solely on the siding material itself when reviewing quotes, inadvertently overlooking critical components that dictate durability, energy efficiency, and protection against moisture. This oversight can lead to costly future repairs, diminished performance, or even health hazards.
This guide provides a comprehensive checklist and framework to help you evaluate siding replacement quotes. Our aim is to empower you to compare not just the finish, but the complete wall system proposed by contractors. By understanding and scrutinizing each layer, from the sheathing to the weather-resistive barrier, insulation, and flashing, you can ensure your home receives a robust, long-lasting, and high-performing exterior envelope. Use this guide to prepare your project specifications, ask informed questions, and systematically compare bids, ensuring you make a decision that protects your home and your investment for decades to come.
Remember, every home and every local jurisdiction has unique requirements. Always verify local permits, licensing, contracts, technical requirements, and property conditions with local authorities and qualified professionals before proceeding with any work.
The Core Principle: Understanding the Wall System
When you consider new siding, it's easy to focus on the visible layer – the material, color, and texture. However, the true performance of your home's exterior relies on a complex assembly of components working together: the wall system. This system is your home's primary defense against the elements, crucial for structural integrity, energy efficiency, and indoor air quality.
What is a "Wall System"?
A wall system is a layered construction designed to protect your home. While specific configurations vary, a typical exterior wall system, from inside to out, includes:
- Interior Finish: Drywall or plaster.
- Framing: Studs, headers, and plates that form the structural skeleton.
- Insulation: Materials within the wall cavities that resist heat flow.
- Sheathing: Plywood, OSB, or other structural panels attached to the framing, providing rigidity and a substrate for other layers.
- Weather-Resistive Barrier (WRB): A material (often house wrap or felt paper) applied over the sheathing to shed water that penetrates the siding.
- Furring Strips (Optional): Vertical or horizontal strips creating an air gap between the WRB and the siding, forming a "rain screen" system.
- Siding: The outermost protective and aesthetic layer.
- Flashing: Thin, impermeable material installed at transitions (windows, doors, corners) to direct water away from vulnerable areas.
Why the Wall System Matters for Siding Replacement
Understanding the wall system is paramount because each component plays a vital role in your home's overall health and performance. A siding replacement project offers a unique opportunity to address issues within these underlying layers that are otherwise inaccessible without significant demolition. Ignoring these components can lead to:
- Moisture Damage: Water infiltration, often due to a compromised WRB or improper flashing, can lead to rot, mold growth, and structural damage. The U.S. Environmental Protection Agency (EPA) emphasizes that controlling moisture is critical for preventing mold and maintaining good indoor air quality, noting that "moisture problems can lead to health problems" and "structural damage." 1
- Reduced Energy Efficiency: Gaps in the sheathing, inadequate insulation, or poor air sealing allow conditioned air to escape and unconditioned air to enter, increasing heating and cooling costs.
- Pest Infestations: Gaps and deteriorated materials can provide entry points for insects and rodents.
- Compromised Structural Integrity: Rotting sheathing or framing can weaken the home's structure.
- Shorter Siding Lifespan: Even the best siding material will fail prematurely if the underlying system is not sound or if moisture is trapped behind it.
A comprehensive siding quote should detail the work proposed for each relevant layer of the wall system, not just the new siding material. This holistic approach ensures long-term performance and protects your investment.
Inventory Every Elevation and Transition
Before soliciting quotes, conduct a thorough inspection of your home's exterior. This detailed inventory will help you communicate your needs clearly to contractors and ensure their bids cover all necessary work. Documenting existing conditions provides a baseline for comparison and helps identify potential issues that might not be immediately obvious.
Documenting Existing Conditions
Walk around your entire home, taking photos and detailed notes. Consider each elevation (front, back, sides) separately. Pay attention to:
- Siding Condition: Note areas of cracking, warping, peeling paint, rot, loose panels, or impact damage.
- Trim, Soffit, and Fascia: Inspect for deterioration, rot, or signs of water damage.
- Window and Door Frames: Check for rot, gaps, or compromised seals.
- Corners and Edges: These are common points of water entry.
- Foundation: Look for gaps between the siding and the foundation.
- Roofline: Observe how the siding meets the roof, especially near eaves and gables.
- Overall Square Footage: While contractors will measure, having a rough estimate helps you verify their calculations.
Identifying Unique Challenges
Certain architectural features and utility penetrations require specialized attention during siding replacement. These areas are often more prone to water infiltration if not properly addressed. Ensure your contractors acknowledge and detail their approach to:
- Windows and Doors: Proper flashing and sealing around these openings are critical. Ask about head flashing, jamb flashing, and sill flashing details.
- Corners: Inside and outside corners need specific trim and flashing details to prevent water intrusion.
- Vents and Exhausts: Dryer vents, bathroom fan exhausts, and attic vents must be properly sealed and flashed into the new siding system.
- Utility Lines: Electrical conduits, gas lines, and hose bibs need careful integration with the new siding.
- Deck Attachments: Where a deck ledger board attaches to the house, flashing is essential to prevent water from pooling behind the siding.
- Chimneys and Dormers: These complex transitions require expert flashing.
- Architectural Details: Bay windows, bump-outs, decorative elements, and varying siding transitions (e.g., stone veneer meeting lap siding) all add complexity.
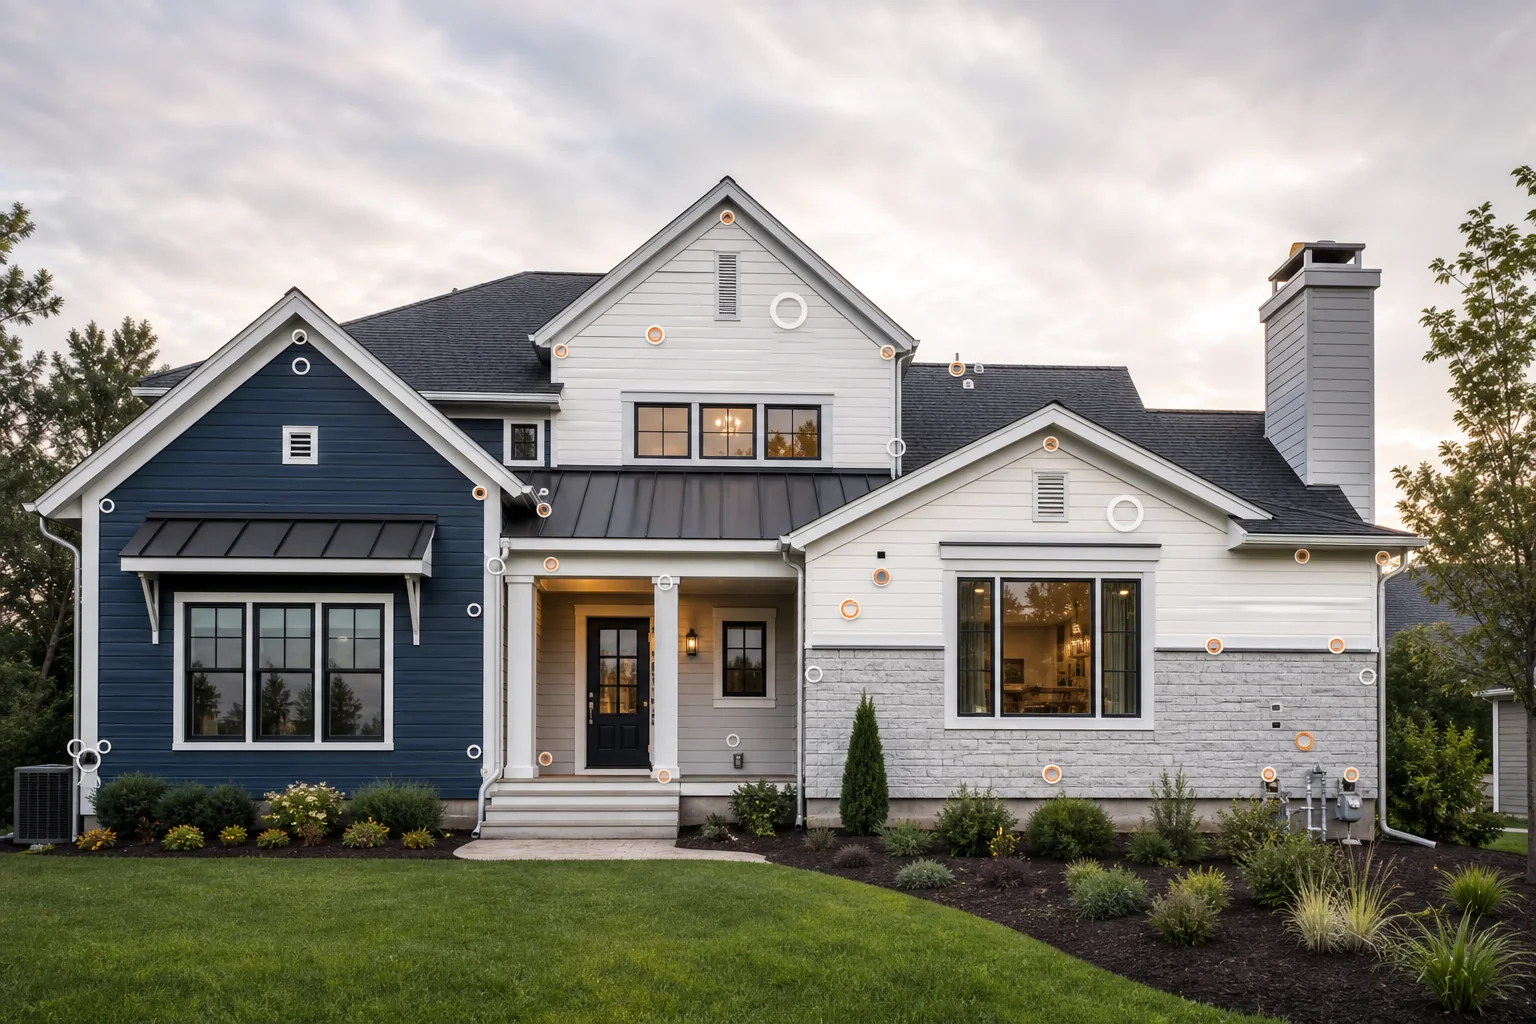
By meticulously documenting these elements, you equip yourself to evaluate whether each contractor's proposal adequately addresses the specific needs of your home, preventing surprises and ensuring a complete, durable installation.
Define the Wall-System Scope
The true value of a siding replacement lies in the quality of the underlying wall system. This section focuses on the critical components beneath the visible siding and how their condition and proposed upgrades should be detailed in your quotes.
Assessing Substrate and Sheathing
The sheathing (typically plywood or OSB) is the structural layer beneath your weather-resistive barrier. It provides rigidity to your home and a solid surface for attaching other components. During siding removal, the sheathing's condition becomes visible:
- Inspection: Contractors should inspect for rot, water damage, delamination, or structural weakness.
- Repair/Replacement: Quotes should specify how damaged sheathing will be addressed. Will it be repaired, or will entire sheets be replaced? What material will be used for replacement?
- Fastening: Ensure the sheathing is properly fastened to the framing.
Addressing compromised sheathing is fundamental. Installing new siding over damaged sheathing is akin to putting a new roof on a rotting deck – it won't last.
Weather-Resistive Barrier (WRB) and Flashing
The WRB is arguably the most critical component of your wall system for moisture management. It's the last line of defense against water that inevitably penetrates the siding. Flashing works in conjunction with the WRB to direct water away from vulnerable areas.
- WRB Importance: The EPA highlights the importance of moisture control in buildings to prevent mold growth and maintain indoor air quality. A properly installed WRB is central to this. 1
- Types of WRB: Common types include asphalt-saturated felt (tar paper) and synthetic house wraps. Quotes should specify the type, brand, and installation method (e.g., shingle-lapped to shed water).
- Flashing Details: This is where many installations fail. Quotes must detail flashing at all penetrations and transitions:
- Window and Door Flashing: Head, jamb, and sill flashing, often using self-adhered membranes or metal.
- Corner Flashing: To prevent water entry at inside and outside corners.
- Penetration Flashing: Around vents, pipes, and electrical boxes.
- Kick-out Flashing: At roof-to-wall intersections to direct water away from the wall.
- Integration: How will the WRB and flashing integrate with existing components and the new siding? Proper overlap and sealing are essential.
Insulation and Air Sealing
Siding replacement offers an excellent opportunity to improve your home's thermal performance and air tightness, which directly impacts energy bills and comfort.
- Cavity Insulation: If the sheathing is removed, or if the walls are opened for other reasons, adding or upgrading cavity insulation (e.g., fiberglass batts, mineral wool, spray foam) can be considered.
- Continuous Insulation (CI): Some projects may incorporate rigid insulation boards over the sheathing, beneath the WRB. This provides a continuous thermal break, reducing thermal bridging through the studs.
- Air Sealing: Sealing gaps and cracks in the sheathing and around penetrations with caulk or foam can significantly reduce air leakage, improving both energy efficiency and indoor air quality. The EPA emphasizes that "air sealing and insulation are two of the most effective ways to improve energy efficiency and comfort in your home." 1
Ventilation Gaps and Rain Screens
A rain screen system incorporates a ventilation gap (typically 1/4" to 3/4") between the WRB and the siding. This gap allows air to circulate and moisture to drain, significantly enhancing the durability and performance of the wall system.
- Benefits: Dries out the wall assembly, reduces hydrostatic pressure, improves siding longevity, and can enhance thermal performance.
- When to Consider: Highly recommended in wet climates, for certain siding materials (e.g., wood), or when aiming for superior moisture management.
- Quote Details: If a rain screen is proposed, the quote should detail the use of furring strips, insect screens at the top and bottom of the gap, and how the system integrates with flashing.
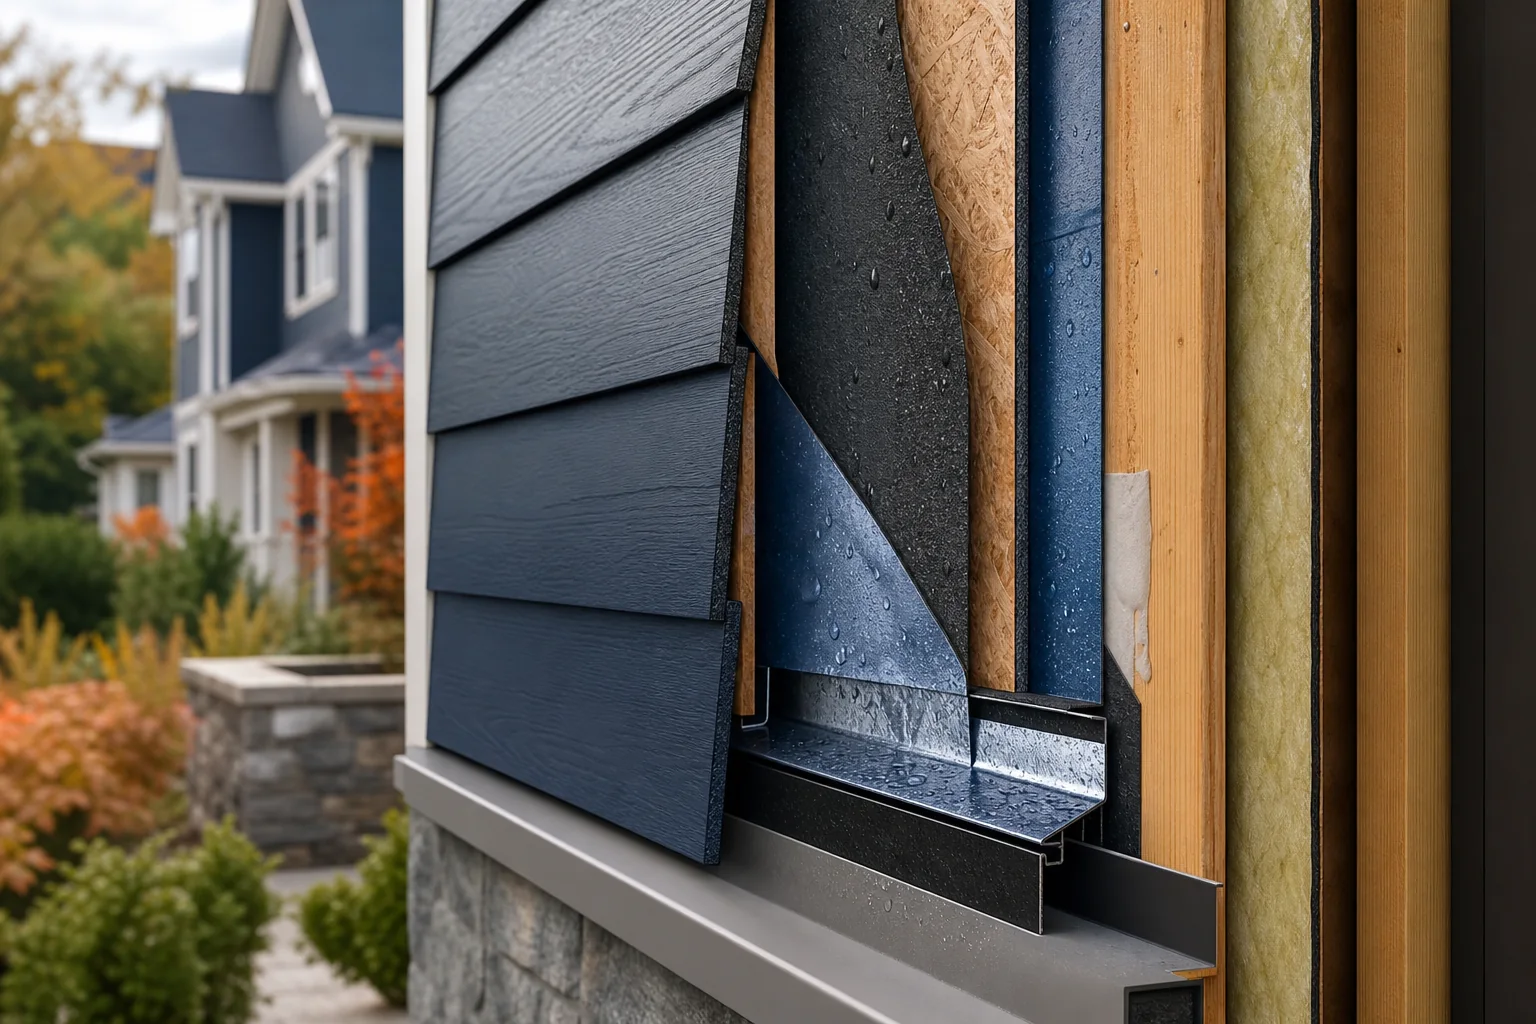
By carefully reviewing how each contractor plans to address these critical wall system components, you can discern the quality and longevity of their proposed solution, moving beyond a simple price comparison to a value assessment.
Agree on the Finished Condition
While the wall system provides the foundation, the finished condition defines your home's aesthetic and immediate curb appeal. This section details the elements that contribute to the final look and long-term maintenance of your new siding.
Siding Material and Profile
The choice of siding material significantly impacts appearance, durability, maintenance, and cost. Your quote should clearly specify:
- Material Type: Vinyl, fiber cement, wood (cedar, redwood, engineered wood), aluminum, stucco, brick, stone veneer, etc.
- Manufacturer and Product Line: Specific brand and product name (e.g., "CertainTeed Monogram 46L" or "James Hardie ColorPlus Lap Siding").
- Profile and Exposure: Lap siding (e.g., 6-inch exposure), vertical siding, shakes, panels, board-and-batten.
- Color and Finish: Pre-finished or to be painted on-site. If painted, specify paint brand, type, and number of coats.
- Quantity: Total square footage of siding to be installed.
Ensure the chosen material aligns with your aesthetic goals, budget, and desired maintenance level. Research the manufacturer's installation guidelines to understand best practices.
Trim, Soffit, and Fascia
Trim elements provide visual definition and protect vulnerable areas. They are integral to the finished look and performance.
- Scope: Will existing trim be removed and replaced, or will new trim be installed over it? What about soffits (underside of eaves) and fascia (boards along the roof edge)?
- Material: Wood, PVC, fiber cement, aluminum coil stock. Each has different maintenance requirements and costs.
- Profile: Dimensions and style of trim boards (e.g., 1x4 window trim, 1x6 corner boards).
- Finish: Pre-finished or painted on-site. If painted, specify details.
- Ventilation: If soffits are replaced, consider adding or upgrading continuous soffit vents for attic ventilation, if applicable.
Paint or Finish
For siding and trim that isn't pre-finished, the quality of the paint job is crucial for both aesthetics and protection.
- Preparation: What surface preparation is included (cleaning, priming, caulking)?
- Paint Type: Brand, product line, and sheen (e.g., Sherwin-Williams Duration Exterior Satin).
- Number of Coats: Typically two finish coats over a primer are recommended for durability.
- Application Method: Spray, brush, or roll.
- Warranty: What warranty does the painter offer on their work, and what is the manufacturer's warranty on the paint itself?
Ancillary Components
These are the details that complete the exterior and ensure functionality. Ensure your quote addresses:
- Gutters and Downspouts: Will they be removed and reinstalled, or replaced? What material (aluminum, copper, steel) and style (K-style, half-round)?
- Exterior Light Fixtures: Removal, reinstallation, or replacement.
- House Numbers and Mailboxes: Removal and reinstallation.
- Vents and Louvers: Replacement of existing dryer vents, attic vents, or foundation vents.
- Caulking and Sealants: Specify type (e.g., elastomeric, silicone) and locations.
- Clean-up: Daily site clean-up and final debris removal.
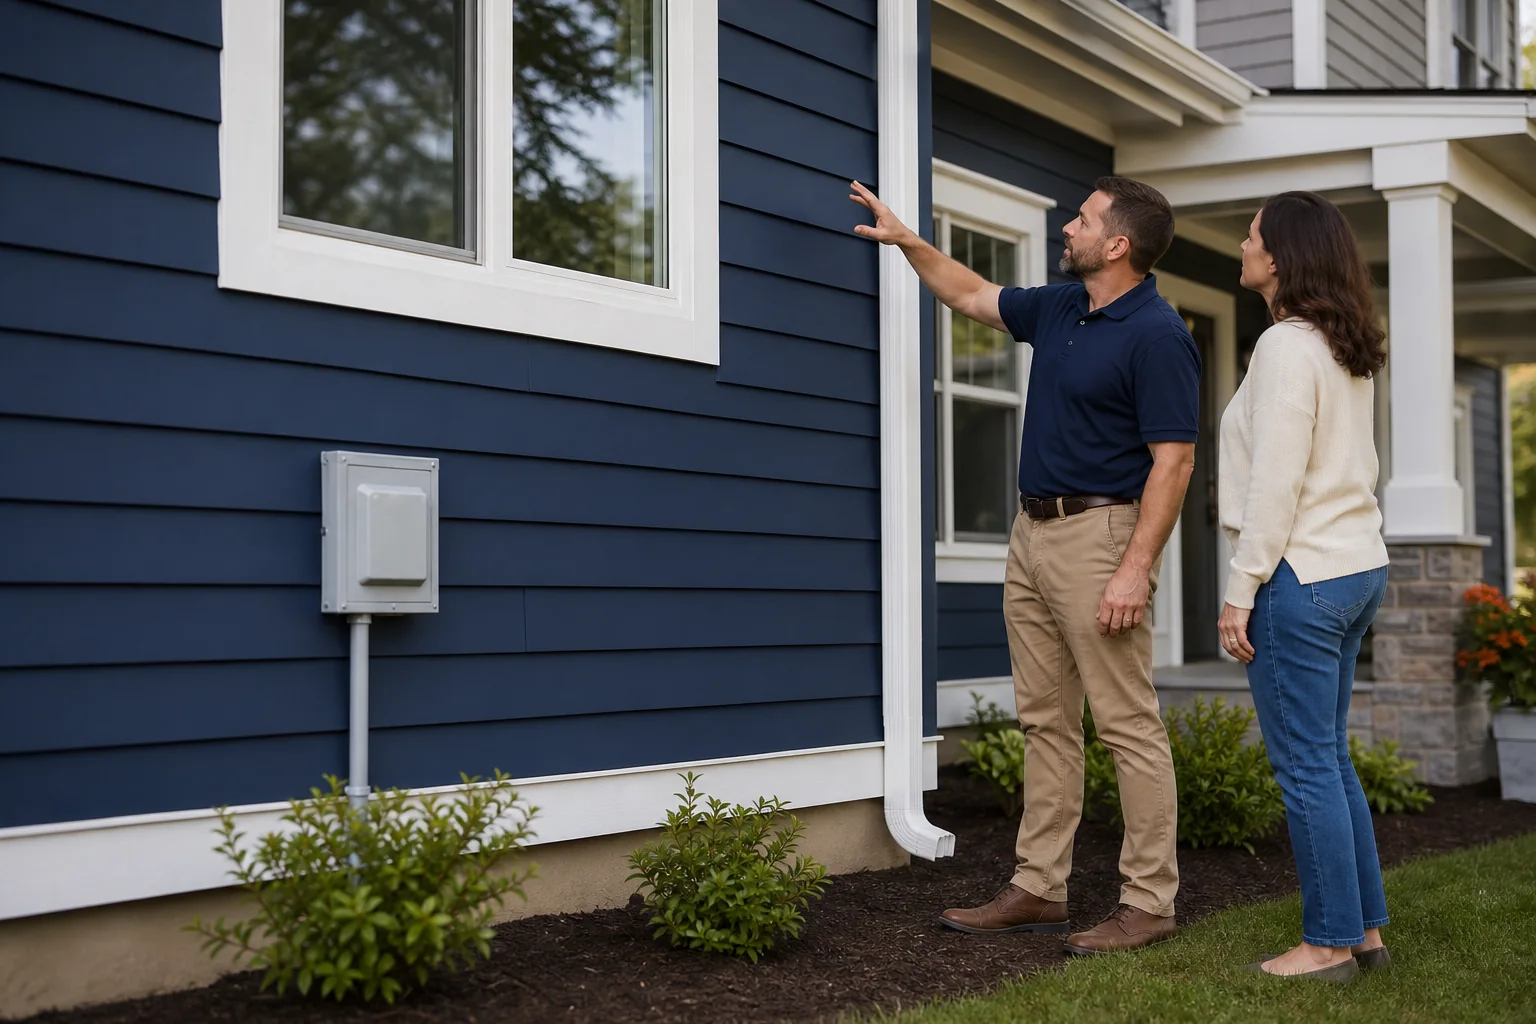
A detailed specification for the finished condition ensures that your expectations align with the contractor's proposal, preventing misunderstandings and ensuring a high-quality outcome.
The Renovation Standard Siding Quote Checklist
Use this comprehensive checklist to prepare your project specifications and systematically compare bids. Ensure every item is addressed by each contractor, even if it's to state "not applicable" or "not included."
Contractor Information
- Contractor Name, Address, Phone, Email
- License Number (verify with local authorities)
- Insurance Certificates (General Liability, Workers' Compensation – verify current status)
- References (at least three recent, relevant projects)
- Start Date and Estimated Completion Date
Scope of Work: Demolition and Preparation
- Method of existing siding removal (e.g., hand-stripping, power tools)
- Disposal of old materials (who is responsible, where will it go?)
- Protection of landscaping, driveways, and adjacent structures
- Inspection of existing sheathing and framing (detailed plan for addressing damage)
- Lead-based paint testing and remediation plan (for homes built before 1978) 2
Scope of Work: Wall System Components
- Sheathing Repair/Replacement:
- Material type (e.g., OSB, plywood)
- Thickness
- Fastening method
- Cost per sheet for unforeseen replacements
- Weather-Resistive Barrier (WRB):
- Type and brand (e.g., synthetic house wrap, asphalt felt)
- Installation method (e.g., shingle-lapped, taped seams)
- Coverage (entire wall, specific areas)
- Flashing:
- Material (e.g., self-adhered membrane, metal)
- Locations (windows, doors, corners, penetrations, roof-to-wall transitions, kick-out)
- Installation details (e.g., integrated with WRB, specific order of layers)
- Insulation (if applicable):
- Type (e.g., rigid foam, batt, blown-in)
- R-value
- Location (cavity, continuous over sheathing)
- Air Sealing (if applicable):
- Method (e.g., caulk, foam)
- Locations (around penetrations, sheathing seams)
- Rain Screen System (if applicable):
- Furring strip material and dimensions
- Insect screening at top/bottom
Scope of Work: Siding & Trim
- Siding Material:
- Type, brand, product line
- Profile, exposure, color/finish
- Total square footage
- Fastening method (e.g., nails, screws, hidden fasteners)
- Manufacturer's installation guidelines adherence
- Trim, Soffit, Fascia:
- Material type (e.g., PVC, fiber cement, wood)
- Dimensions and profiles
- Replacement vs. covering existing
- Finish (pre-finished or painted on-site)
- Soffit ventilation (if applicable)
- Caulking and Sealants:
- Type and brand
- Locations (e.g., around windows, doors, trim joints)
Scope of Work: Ancillary Items
- Removal and reinstallation/replacement of gutters and downspouts
- Removal and reinstallation/replacement of exterior light fixtures, hose bibs, electrical outlets, house numbers, mailboxes, etc.
- Replacement of vents (dryer, attic, foundation)
- Painting (if applicable): surface prep, primer, paint type/brand, number of coats
Site Management and Logistics
- Daily clean-up procedures
- Final site clean-up and debris removal
- Protection of property (landscaping, windows, driveway)
- Access to utilities (water, electricity)
- Restroom facilities for crew
- Supervision plan (who is the primary contact?)
Payment and Schedule
- Total project cost
- Payment schedule (down payment, progress payments, final payment)
- Change order process (how will scope changes be handled?) Renovation Change Order Checklist
- Estimated project timeline
- Penalties for delays (if any)
Warranties and Insurance
- Contractor's workmanship warranty (duration, what it covers)
- Manufacturer's product warranty (siding, WRB, paint, etc.)
- Proof of contractor's general liability insurance
- Proof of contractor's workers' compensation insurance
Comparing Quotes: A Structured Approach
Once you have multiple quotes, resist the urge to simply pick the lowest price. A thorough comparison involves understanding what each contractor proposes, identifying differences in scope, and evaluating the overall value. This structured approach helps you make an informed decision.
Beyond the Bottom Line
The total cost is important, but it's rarely the sole indicator of the best value. A lower bid might omit critical steps or materials, leading to a substandard job that costs more in the long run. Conversely, a higher bid might include essential upgrades or superior materials that justify the expense.
Focus on comparing "apples to apples." This means ensuring that each quote addresses the same scope of work, uses comparable materials, and includes similar levels of detail for the wall system components. If one quote is significantly lower, it's often because it's missing crucial elements.
Using a Comparison Framework
To effectively compare bids, create a comparison matrix or use a dedicated tool. A Contractor Quote Comparison Scorecard can be invaluable. List all the items from the Renovation Standard Siding Quote Checklist down one side, and each contractor's name across the top. Then, fill in how each contractor addresses every point. This visual comparison immediately highlights discrepancies:
- Inclusions/Exclusions: Does Contractor A include new flashing at all windows, while Contractor B only mentions "basic flashing"?
- Material Specifications: Does Contractor A specify a premium synthetic WRB, while Contractor B only lists "house wrap"?
- Workmanship Details: Does Contractor A detail how they will handle lead paint, while Contractor B does not mention it?
- Warranties: Are the workmanship warranties comparable in length and coverage?
Don't hesitate to ask contractors to clarify vague items or to provide pricing for items they initially excluded but you deem essential. This process helps standardize the bids for a fair comparison.
Understanding Allowances and Exclusions
Pay close attention to "allowances" and "exclusions" in your quotes:
- Allowances: These are budget estimates for items whose exact cost isn't known at the time of the quote (e.g., "allowance of $500 for unforeseen sheathing repair"). Understand what happens if the actual cost exceeds the allowance.
- Exclusions: These are items explicitly *not* included in the quote (e.g., "Does not include painting of existing trim"). Make sure you are aware of all exclusions, as they represent work you will either need to do yourself or pay extra for.
Verifying Contractor Credentials
Before making a final decision, verify the contractor's credentials. The Federal Trade Commission (FTC) advises consumers to check references, verify licenses, and ensure the contractor is insured. 3
- Licensing: Confirm their license is current and valid with your state or local licensing board.
- Insurance: Obtain current certificates of insurance for General Liability and Workers' Compensation directly from the insurance provider, not just from the contractor. This protects you from liability if there's an accident on your property.
- References: Contact past clients and ask about their experience, project timeline, communication, and satisfaction with the work.
Recognizing Red Flags and Protecting Your Investment
While most contractors are reputable, the home improvement industry can attract unscrupulous individuals. Being aware of warning signs and understanding your rights can protect you from scams and ensure a successful project.
Common Scams and Warning Signs
The FTC provides guidance on how to avoid home improvement scams. Be wary of contractors who exhibit any of the following behaviors: 3
- Unsolicited Offers: Showing up at your door offering a "special deal" because they "just finished a job down the street."
- High-Pressure Sales Tactics: Demanding an immediate decision or claiming the offer is only good "today."
- Cash-Only Deals: Refusing checks or credit cards, especially for a large down payment.
- No Written Contract: Insisting on a verbal agreement for a significant project.
- Vague or Incomplete Contracts: A contract that lacks specific details about the scope of work, materials, timeline, or payment schedule.
- Demanding Full Payment Upfront: Reputable contractors typically require a reasonable down payment (often 10-30%) and progress payments tied to completed work.
- Lack of References or Credentials: Unable or unwilling to provide proof of license, insurance, or references.
- Out-of-State License Plates: While not always a red flag, it can indicate a transient crew less accountable to local regulations.
- Offering to Use Your Insurance: Suggesting you inflate the claim or offering to "handle" the insurance process for you.
Lead-Based Paint Considerations
For homes built before 1978, there is a high probability of lead-based paint being present. Disturbing lead-based paint during renovation can create hazardous lead dust and chips, which are harmful, especially to children and pregnant women. The EPA's Renovation, Repair, and Painting (RRP) Rule requires contractors working on pre-1978 homes to be Lead-Safe Certified. 2
- Ask for Certification: Ensure your contractor is EPA Lead-Safe Certified. Ask to see their firm's certification and the individual renovator's certificate.
- Testing: Discuss lead paint testing. The contractor should either assume lead paint is present or test for it.
- Work Practices: The quote should detail lead-safe work practices, including containment, waste disposal, and clean-up procedures.
- Homeowner Responsibilities: Understand any precautions you need to take during the renovation.
Contract Essentials
A detailed, written contract is your primary protection. It should clearly outline every aspect of the project. Ensure your contract includes:
- Detailed Scope of Work: As outlined in the Renovation Standard Siding Quote Checklist.
- Material Specifications: Brands, models, colors, quantities.
- Project Timeline: Start and estimated completion dates.
- Payment Schedule: Clear breakdown of payments tied to project milestones.
- Change Order Process: How changes to the scope of work will be documented and priced. (Refer to our Renovation Change Order Checklist for more details.)
- Warranties: Both workmanship and product warranties.
- Insurance Information: Contractor's liability and workers' compensation.
- Permits: Who is responsible for obtaining necessary permits.
- Lien Waivers: To protect you from subcontractors or suppliers placing a lien on your property if the contractor fails to pay them.
- Dispute Resolution: How disagreements will be handled.
Local Regulations and Permits
Siding replacement often requires a building permit from your local municipality. This ensures the work complies with local building codes and standards. Always verify local permits, licensing, contracts, technical requirements, and property conditions with local authorities.
- Permit Responsibility: Clarify who will obtain the permit – typically the contractor.
- Inspections: Understand what inspections are required by the building department (e.g., framing, WRB, final inspection).
- Code Compliance: Ensure the proposed work meets or exceeds current local building codes.
Worked Example: Comparing Two Siding Quotes
Let's consider a hypothetical scenario where a homeowner, Sarah, needs to replace the siding on her 1965 ranch home. She has received two quotes. We'll focus on the differences in their wall system proposals, not their prices, to illustrate the value of a detailed comparison.
Scenario: Sarah's Ranch Home Siding Replacement
Sarah's existing siding is original aluminum, showing dents and fading. She wants to upgrade to fiber cement lap siding for durability and a fresh look. Her home was built before 1978, so lead paint is a concern. She also wants to improve her home's energy efficiency.
Contractor A: "Basic Siding Installers"
- Siding: Fiber cement lap siding, specific brand and profile.
- Demolition: Remove existing aluminum siding, dispose of debris.
- Sheathing: "Inspect and repair damaged sheathing as needed." (No detail on material or cost for repairs).
- WRB: "Install house wrap." (No brand, type, or installation method specified).
- Flashing: "Install standard flashing at windows and doors." (No material or detailed locations).
- Insulation/Air Sealing: Not mentioned.
- Trim: "Wrap existing wood trim with aluminum coil stock."
- Lead Paint: Not mentioned.
- Warranty: 1-year workmanship.
Contractor B: "Premium Home Exteriors"
- Siding: Fiber cement lap siding (specific brand, product line, 6-inch exposure, pre-finished color).
- Demolition: Remove existing aluminum siding, dispose of debris in designated containers. Protection of landscaping with tarps.
- Sheathing: "Inspect all sheathing. Replace any damaged sections with 7/16" OSB, fastened with ring-shank nails. Allowance of $75 per 4x8 sheet for unforeseen replacements."
- WRB: "Install Tyvek HomeWrap, shingle-lapped with 6-inch horizontal overlap and 12-inch vertical overlap. All seams taped with Tyvek tape."
- Flashing: "Install self-adhered flashing membrane (e.g., Vycor Plus) at all window and door sills, jambs, and heads, integrated with WRB. Install metal head flashing above all windows/doors. Install kick-out flashing at all roof-to-wall intersections. Install pre-formed corner flashing at all outside corners."
- Insulation/Air Sealing: "Seal all penetrations (pipes, wires) and sheathing gaps with exterior-grade caulk/foam before WRB installation. Offer to install 1/2" rigid foam continuous insulation over existing sheathing for an additional cost."
- Trim: "Remove existing wood trim. Install new 5/4 PVC trim boards at windows, doors, and corners. All joints sealed with elastomeric caulk."
- Lead Paint: "Our firm is EPA Lead-Safe Certified. We will conduct lead paint testing. If positive, we will implement lead-safe work practices including containment, HEPA vacuuming, and proper waste disposal as per EPA RRP guidelines."
- Warranty: 5-year workmanship, plus manufacturer's warranties for all products.
Analysis of Differences
By using the checklist, Sarah can clearly see the differences:
- Sheathing: Contractor A is vague; Contractor B specifies material, fastening, and a clear allowance for repairs.
- WRB: Contractor A is generic; Contractor B specifies a brand, detailed installation method, and taped seams, indicating superior moisture protection.
- Flashing: Contractor A's "standard flashing" is concerning; Contractor B provides extensive detail on materials, locations, and integration, demonstrating a robust water management strategy.
- Insulation/Air Sealing: Contractor A ignores this; Contractor B offers air sealing as standard and an insulation upgrade option, addressing Sarah's energy efficiency goal.
- Trim: Contractor A proposes wrapping, which can trap moisture; Contractor B proposes full replacement with a durable, low-maintenance material.
- Lead Paint: Contractor A's omission is a major red flag for a pre-1978 home; Contractor B demonstrates compliance with EPA regulations and a clear plan.
- Warranty: Contractor B offers a significantly longer workmanship warranty, reflecting confidence in their quality.
While Contractor B's quote will likely be higher, the detailed scope of work, superior materials, and adherence to best practices for the wall system and lead safety offer significantly greater long-term value, durability, and peace of mind. Sarah can now make an informed decision based on value, not just initial cost.
Project Closeout and Record Keeping
The project isn't truly complete until the final walkthrough is done, all documentation is in order, and you have a clear record of the work performed. This final stage is crucial for ensuring satisfaction, validating warranties, and preparing for future home maintenance or sales.
Final Walkthrough and Punch List
Before making the final payment, conduct a thorough final walkthrough with your contractor. Use your original contract and specifications as a guide. Look for:
- Completeness: Is all the work outlined in the contract finished?
- Quality: Are there any visible defects, loose pieces, poor caulking, or uneven installations?
- Cleanliness: Has the site been thoroughly cleaned, and all debris removed? Check for nails, scraps, and packaging.
- Functionality: Do all reinstalled items (lights, hose bibs) work correctly?
- Damage: Is there any damage to your property (landscaping, driveway) that needs to be addressed?
Create a "punch list" of any items that need correction or completion. Agree on a timeline for these items to be resolved. Withhold a reasonable portion of the final payment until all punch list items are satisfactorily addressed. For a detailed guide, refer to our Home Renovation Closeout Checklist.
Warranty Documentation
Warranties are only as good as the paper they're written on. Ensure you receive all relevant warranty documents:
- Contractor's Workmanship Warranty: A written statement from your contractor detailing the duration and coverage of their labor warranty.
- Manufacturer's Product Warranties: For the siding material, WRB, paint, and any other significant components. These often require proof of purchase and proper installation.
- Transferability: Understand if warranties are transferable to a new homeowner if you sell your house.
Store these documents in a safe, accessible place. They are vital for future claims or if you sell your home.
Maintaining Project Records
Comprehensive record-keeping is invaluable for future reference, maintenance, and potential issues. Create a dedicated file for your siding project that includes:
- Contract: The signed agreement with all addendums and change orders.
- Invoices and Payment Records: Proof of all payments made.
- Permits: Copies of all approved permits and inspection sign-offs.
- Photos: Before, during, and after photos of the project. These can be crucial if disputes arise.
- Product Specifications: Brochures, product sheets, and color codes for all installed materials (siding, trim, paint).
- Warranty Documents: As detailed above.
- Contact Information: For the contractor, subcontractors, and any key suppliers.
These records provide a complete history of the work, which can be essential for future repairs, insurance claims, or when providing disclosures during a home sale. Consider using a Renovation Budget Calculator to track all project expenses for your records.
Frequently Asked Questions (FAQs)
Q1: How do I know if my existing wall system needs repair beyond just new siding?
A: Signs of underlying wall system issues often manifest as visible problems on the exterior or interior. Look for warped, soft, or rotting existing siding; peeling paint that recurs quickly after repainting; water stains on interior walls or ceilings; persistent mold or mildew growth on the exterior; or unusually high energy bills. During siding removal, a reputable contractor will inspect the sheathing and framing for rot, water damage, or pest infestations. A detailed quote should include a plan for addressing these potential issues, often with an allowance for unforeseen repairs.
Q2: What is a weather-resistive barrier, and why is it so important?
A: A weather-resistive barrier (WRB), often called house wrap or building paper, is a material installed over the sheathing and under the siding. Its primary purpose is to shed any water that penetrates the outer siding layer, preventing it from reaching the structural components of your home. It also acts as an air barrier, reducing drafts. The EPA emphasizes that controlling moisture is critical for preventing mold and maintaining good indoor air quality. A properly installed WRB, integrated with flashing, is your home's last line of defense against water damage, rot, and mold growth, significantly extending the life of your wall system. 1
Q3: Should I consider upgrading insulation during siding replacement?
A: Yes, siding replacement presents an excellent opportunity to improve your home's insulation and air sealing. With the exterior walls exposed, it's much easier and more cost-effective to add or upgrade cavity insulation (within the wall studs) or install continuous insulation (rigid foam boards) over the sheathing. This can significantly improve your home's energy efficiency, reduce heating and cooling costs, and enhance indoor comfort. Discuss these options with your contractor and consider the long-term savings versus the upfront investment.
Q4: What are the key differences between a "good" and a "great" siding warranty?
A: A "good" siding warranty typically covers the material itself against manufacturing defects for a certain period (e.g., 20-50 years, often prorated). A "great" warranty goes further. It often includes a non-prorated period, covers labor for replacement, and may be transferable to subsequent homeowners. Crucially, a great warranty will also be backed by a reputable manufacturer with a long history. Beyond the product, a "great" contractor's workmanship warranty will be substantial (e.g., 5-10 years or more), clearly outlining what is covered and how claims are handled, demonstrating confidence in their installation quality.
Q5: How can I ensure my contractor handles lead-based paint safely if my home is older?
A: If your home was built before 1978, assume lead-based paint is present. You must ensure your contractor is EPA Lead-Safe Certified. Ask to see their firm's certification and the individual renovator's certificate. The contractor should either test for lead paint or assume it's present and follow lead-safe work practices, which include containing the work area, minimizing dust, using a HEPA vacuum for cleanup, and properly disposing of lead-contaminated waste. The EPA's Renovation, Repair, and Painting (RRP) program provides specific guidelines for consumers and contractors to prevent lead contamination. 2
Q6: What is the purpose of a rain screen, and is it always necessary?
A: A rain screen system creates a small air gap (typically 1/4" to 3/4") between the weather-resistive barrier (WRB) and the exterior siding. This gap allows air to circulate, promoting drainage and drying of any moisture that penetrates the siding. It helps equalize air pressure, reducing the amount of water driven into the wall by wind. While not always strictly "necessary" by code in all regions, a rain screen significantly enhances the durability and longevity of the wall system, especially in wet climates or with certain siding materials like wood. It is a best practice for superior moisture management and can improve the performance of many siding types.
This guide organizes a project conversation. It is not engineering, legal, code or trade advice. Property conditions and local requirements must be verified by qualified professionals.