Your Window Installation Day Playbook: A Homeowner's Essential Checklist
Window installation day marks a significant milestone in any home renovation. It’s the culmination of planning, selection, and coordination, transforming your living space with improved aesthetics, energy efficiency, and comfort. As a homeowner, being prepared and informed on this day is crucial for a smooth process and a successful outcome. This guide provides a comprehensive checklist and framework to help you understand, monitor, and manage your window installation from the moment the crew arrives until the final walkthrough.
This article is designed to be your go-to resource, whether you're preparing for an upcoming installation, comparing contractor approaches, or actively overseeing the work. We've structured it to provide actionable steps and insights, moving from pre-installation preparations through the installation process, and concluding with essential closeout procedures. Use the master checklist as a quick reference, and delve into the detailed sections for deeper understanding and specific guidance. By following these steps, you can ensure your window installation meets your expectations and protects your investment.
The Master Checklist: Your Installation Day Overview
This master checklist provides a high-level overview of the key actions and considerations for your window installation day. Refer to the detailed sections below for in-depth explanations and specific guidance on each item.
Pre-Installation Day
- ☐ Confirm installation schedule and crew arrival time.
- ☐ Review your contract and scope of work.
- ☐ Clear access paths inside and outside the home.
- ☐ Remove window treatments, wall hangings, and fragile items.
- ☐ Move furniture away from windows.
- ☐ Secure pets and children away from work areas.
- ☐ Protect floors and nearby furnishings with drop cloths.
- ☐ Identify power outlets for tools.
- ☐ Discuss bathroom access and break areas with the contractor.
- ☐ Confirm lead-safe practices if your home was built before 1978.
Installation Day: Arrival & Setup
- ☐ Greet the crew and confirm project lead.
- ☐ Review the installation plan and sequence.
- ☐ Confirm window types and sizes match the order.
- ☐ Discuss any last-minute questions or concerns.
- ☐ Verify protection measures are in place.
During Installation: Monitoring Progress
- ☐ Observe work for adherence to contract and safety.
- ☐ Note any unexpected issues (e.g., rot, structural damage).
- ☐ Communicate promptly with the project lead about concerns.
- ☐ Document progress with photos/notes.
- ☐ Ensure proper disposal of old windows and debris.
Post-Installation: Final Walkthrough & Closeout
- ☐ Conduct a thorough walkthrough with the project lead.
- ☐ Test all windows for proper operation (opening, closing, locking).
- ☐ Inspect for damage to new windows, frames, and surrounding areas.
- ☐ Check for complete sealing and insulation around frames.
- ☐ Verify proper cleanup, inside and out.
- ☐ Address any punch list items.
- ☐ Obtain warranty information and maintenance instructions.
- ☐ Confirm final payment terms and lien waivers.
- ☐ Store all project documentation securely.
Before the Crew Arrives: Essential Preparations
The success of your window installation day often hinges on the preparations made beforehand. A well-prepared home facilitates efficiency for the installation crew and minimizes potential disruptions for you. This stage is about setting the environment for a smooth operation and ensuring all critical information is aligned.
Communication and Confirmation
A few days before the scheduled installation, reach out to your contractor to confirm the date, estimated arrival time, and the expected duration of the work. This is also an opportune moment to clarify any last-minute questions you might have regarding the process or crew size. Confirm who the primary contact person will be on the day of installation. Review your contract one final time to refresh your memory on the agreed-upon scope of work, materials, and payment schedule. This proactive communication helps prevent misunderstandings and ensures everyone is on the same page.
Prepare Rooms Access and Belongings
The installation crew will need clear, unobstructed access to all windows, both from the interior and exterior of your home. Begin by removing all window treatments, such as blinds, curtains, and shades. Take down any wall hangings, artwork, or decorative items from walls near the windows, as vibrations or accidental bumps could cause them to fall or break. Move furniture, including sofas, tables, and bookshelves, at least three to five feet away from each window opening. If items are too heavy to move alone, ask family or friends for assistance, or discuss with your contractor if their crew can help with major furniture relocation as part of their service (ensure this is in your contract). Secure pets in a safe, quiet area away from the work zones, and ensure children are supervised and understand to avoid the construction areas. This not only protects your belongings but also creates a safer and more efficient workspace for the installers.

Protecting Your Property
Dust, debris, and tools are inevitable during window replacement. Protect your floors, carpets, and nearby furnishings by laying down heavy-duty drop cloths or plastic sheeting. Consider covering larger pieces of furniture that cannot be moved. For exterior work, clear any landscaping, potted plants, or outdoor furniture from directly beneath the windows. If you have a sprinkler system, mark the heads or inform the crew of their location to prevent accidental damage. Identify and point out accessible power outlets that the crew can use for their tools. Discuss with your contractor where they prefer to set up their equipment and where they will stage the new windows and dispose of the old ones. This pre-emptive protection minimizes cleanup and potential damage.
It's also critical to consider the age of your home. If your home was built before 1978, there is a possibility of lead-based paint being present. Disturbing lead-based paint during renovation can create hazardous lead dust and chips. Federal law requires contractors working in homes built before 1978 to be certified in Lead-Safe Renovation, Repair, and Painting (RRP) practices if they disturb more than six square feet of interior painted surface or 20 square feet of exterior painted surface (EPA RRP Program). Confirm with your contractor that they are RRP certified and that they will follow lead-safe work practices, including containment, waste disposal, and thorough cleanup, if lead paint is a concern.
Installation Day Begins: Arrival and Initial Setup
The arrival of the installation crew marks the official start of your project. This initial phase is crucial for establishing clear communication, confirming the plan, and ensuring the work begins on the right foot. Your active participation during this stage can help prevent issues down the line.
Contractor Arrival and Introductions
When the crew arrives, take a moment to greet them. Ask to speak with the project lead or foreman who will be overseeing the work. Confirm their identity and that they are indeed from the company you hired. This is a good opportunity to briefly walk them through your home, pointing out the windows to be replaced, any specific access points, and where you've prepared the work areas. Reiterate any particular concerns or instructions you may have, such as avoiding certain areas of the house or being mindful of specific landscaping features. This personal interaction helps establish a positive working relationship and ensures the crew is fully aware of your property's layout and your expectations.
Confirming the Opening-by-Opening Sequence
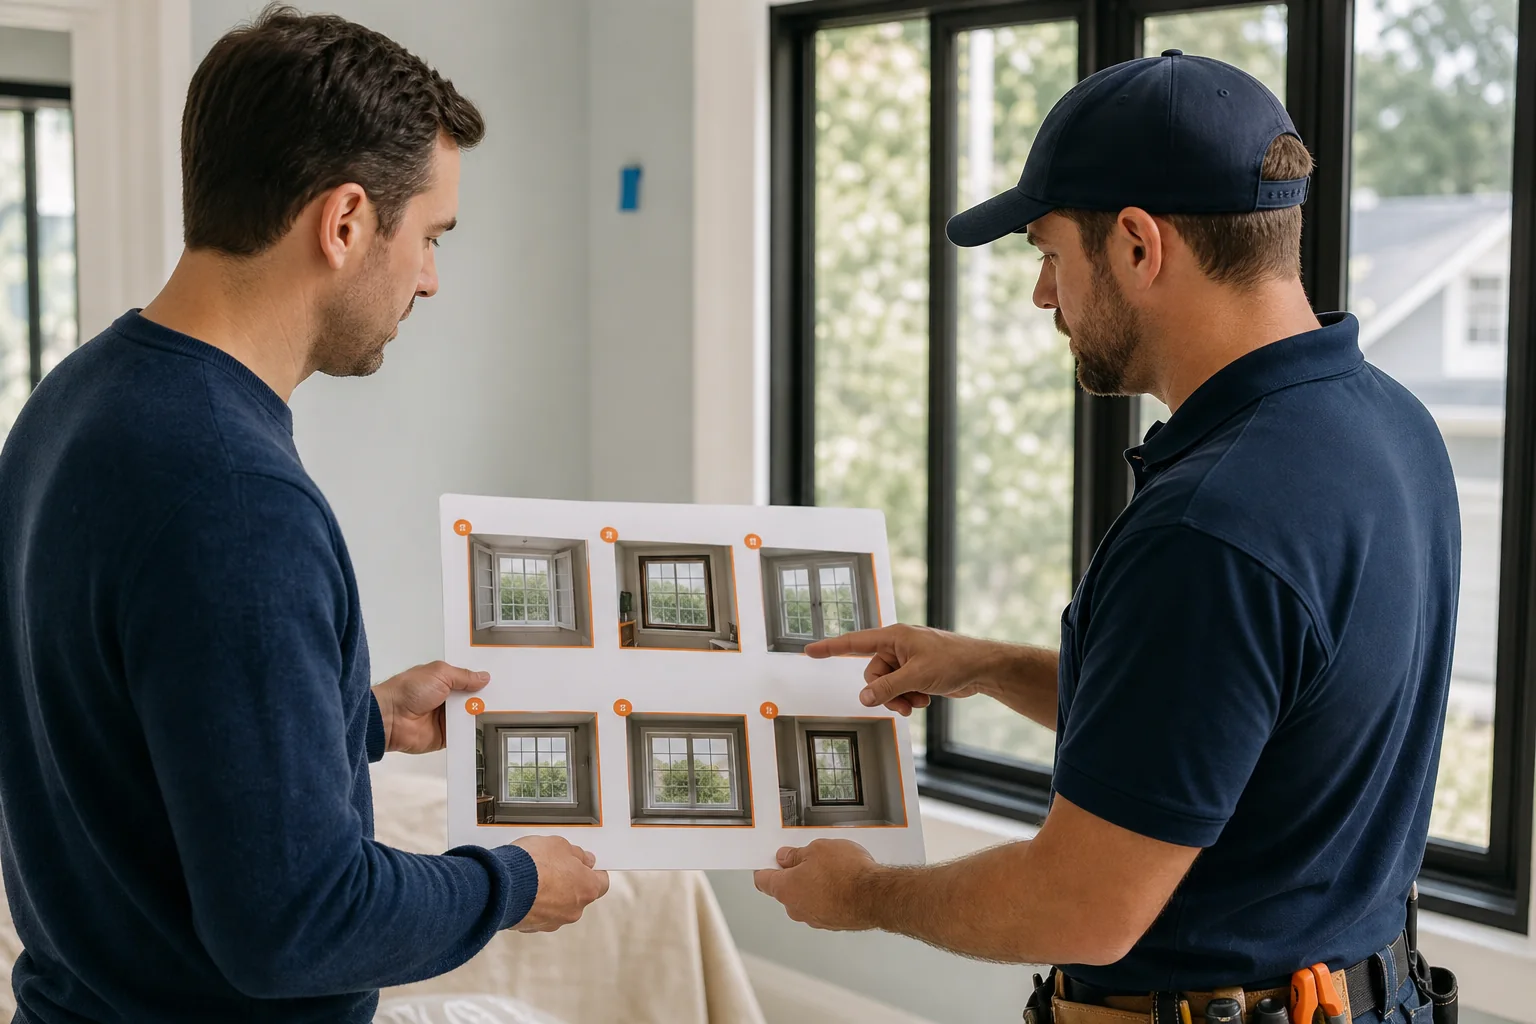
Before any work begins, ask the project lead to review the installation plan for each window opening. This includes confirming which specific window unit goes into which opening. While this might seem redundant, it's a critical step to prevent misinstallations, especially if you have different window types, sizes, or features (e.g., obscure glass, specific hardware finishes) in various locations. Compare the windows being brought in against your contract or order form. This is your chance to catch any discrepancies before they become costly and time-consuming problems. A quick visual check of the labels or markings on the new windows can confirm they match your specifications. This proactive verification is a key component of a homeowner's control framework, ensuring the product delivered matches the product ordered.
Understanding the Process and Safety Measures
Take a few minutes to understand the general sequence of operations the crew plans to follow. Will they remove all old windows first, or will they install new ones immediately after removal? Understanding their workflow can help you anticipate noise levels, dust, and when certain areas of your home might be temporarily exposed to the elements. Inquire about their safety protocols, especially regarding tool usage, debris management, and securing the work site. This is particularly important if you have children or pets who might inadvertently wander into a work zone. A reputable contractor will have clear safety guidelines in place (Energy.gov Window Installation Guide). Knowing these details allows you to better manage your household during the installation process and ensures a safer environment for everyone.
Monitoring Progress: During the Installation
While you've hired professionals, your role as a homeowner doesn't end after the initial setup. Thoughtful observation and timely communication during the installation process are vital. This section guides you on what to look for and how to address any concerns that may arise.
Observing Work Ethic and Site Management
Periodically check in on the work being performed. Observe the crew's professionalism, their adherence to safety standards, and how they manage the work site. Are they keeping the area as clean and organized as possible? Are they taking precautions to protect your property, such as using drop cloths and covering furniture? While you don't need to hover, occasional check-ins allow you to gauge progress and ensure the work aligns with your expectations and the contract terms. Pay attention to how they handle the old windows and debris; proper disposal is a sign of a responsible contractor. The Contractor Quote Comparison Scorecard can help you evaluate these aspects even before hiring.
Addressing Questions and Concerns
If you have questions or notice something that concerns you, address it promptly and politely with the project lead. Avoid interrupting the crew while they are performing critical tasks, but don't hesitate to speak up if you observe potential issues. For instance, if you see a new window being installed that appears to be the wrong type, or if you notice damage to your property, bring it to their attention immediately. Clear and respectful communication is key. Document your concerns with notes and, if appropriate, photos. This record can be invaluable if further discussion or resolution is needed later. Remember, it's easier to correct an issue early in the process than after the work is completed.
Managing Unexpected Issues
Renovations, especially those involving structural elements like windows, can sometimes uncover unexpected issues. This might include discovering rot in the window frame, water damage, or even structural problems within the wall. If such issues arise, the project lead should immediately inform you. It's crucial to understand the nature of the problem, its potential impact on the project timeline and cost, and the proposed solution. Do not authorize additional work or changes without a clear understanding and, ideally, a written change order. For significant issues, you may need to consult your original contract to see how such contingencies are addressed. Be prepared for potential delays and additional costs if unforeseen repairs are necessary. This is where a Renovation Change Order Checklist becomes an invaluable tool to manage scope and cost adjustments.
The Final Review: Post-Installation Walkthrough
The final walkthrough is your opportunity to thoroughly inspect the completed work and ensure everything meets your expectations and contractual agreements. This is a critical step before making final payments.
Completing the Final Walkthrough
Once the installation crew indicates they are finished, conduct a comprehensive walkthrough with the project lead. Go through each newly installed window, both inside and out. Use your contract and any agreed-upon specifications as your guide. Don't rush this process. Take your time to examine every detail. This is your last chance to identify any issues before the crew leaves the site. It’s helpful to have a copy of your contract or work order with you to verify that all agreed-upon items have been completed.

Testing Window Functionality
For each window, systematically test its functionality. Open and close it multiple times to ensure smooth operation. Check that it locks securely and unlocks easily. If it's a double-hung window, test both sashes. For casement windows, operate the crank to open and close them fully. Verify that screens are properly installed and free of tears or damage. Any stiffness, sticking, or difficulty in operation should be noted immediately. Proper functionality is not just about convenience; it's essential for security and energy efficiency.
Inspecting for Damage and Debris
Beyond functionality, meticulously inspect for any damage to the new windows themselves, their frames, and the surrounding areas. Look for scratches, dents, or chips on the glass, frames, and sills. Check the caulking and sealing around the window frames; it should be uniform, smooth, and complete, without gaps or cracks, both inside and out. Proper sealing is critical for preventing air and water infiltration (Energy.gov Window Installation Guide). Also, inspect the areas around the windows for any damage to walls, paint, or trim that may have occurred during installation. Finally, ensure the work area, both interior and exterior, has been thoroughly cleaned of all debris, old window parts, and packaging materials. The site should be left in a condition that is as good as, or better than, when they arrived.
A Homeowner's Control Framework: Ensuring Accountability
Taking control of your renovation project means more than just observing; it involves a systematic approach to ensure accountability from your contractor and quality for your home. This framework helps you maintain oversight throughout the window installation process.
Documentation as Your Guide
Your contract is the cornerstone of your control framework. It should clearly outline the scope of work, materials, timeline, payment schedule, and warranty information. Keep all communications, including emails, text messages, and notes from conversations, organized. Take photos before, during, and after the installation. These documents serve as objective evidence if any disputes arise. They help you compare the work being done against what was agreed upon and provide a clear record of the project's progression. A well-documented project protects both you and the contractor by establishing clear expectations and a verifiable history of the work.
Communication Protocols
Establish clear communication protocols with your contractor from the outset. Know who your primary point of contact is and how to reach them. Agree on preferred methods of communication (e.g., email for formal requests, phone for urgent matters). If you have concerns, address them with the project lead on-site first. If the issue is not resolved, escalate it to the contractor's main office. Always aim for written confirmation of significant decisions or changes, even if initially discussed verbally. Effective communication prevents misunderstandings and ensures that any issues are addressed promptly and officially.
Payment Milestones and Holdbacks
Your contract should detail a payment schedule tied to specific project milestones, not just arbitrary dates. For window installation, typical milestones might include a deposit upon signing, a payment upon delivery of windows, and a final payment upon satisfactory completion of the installation and walkthrough. Avoid paying the full amount upfront. A common practice is to hold back a percentage of the final payment (e.g., 10-15%) until all work is completed to your satisfaction, all punch list items are addressed, and you have received all necessary documentation, such as lien waivers and warranty information. This holdback provides leverage to ensure the contractor completes the job thoroughly and addresses any lingering issues. Always verify local regulations regarding payment schedules and holdbacks.
Spotting Red Flags: Warning Signs During Installation
Even with thorough preparation, issues can arise. Recognizing red flags early can help you intervene before minor problems escalate into major disputes or costly errors. Being vigilant is part of protecting your investment.
Communication Breakdown
A significant red flag is a consistent lack of communication or an unwillingness to address your questions or concerns. If the project lead or contractor avoids your calls, provides vague answers, or dismisses your observations without proper explanation, it's a sign that something might be amiss. Effective communication is the bedrock of a successful contractor-homeowner relationship. A contractor who is transparent and responsive is generally more reliable and accountable.
Unsafe Practices
Observe the crew's adherence to safety. Are they using appropriate personal protective equipment (PPE) like safety glasses and gloves? Are ladders stable and properly secured? Is the work area kept reasonably clear of hazards? Are power tools being used responsibly? Unsafe practices not only put the crew at risk but can also lead to damage to your property or even injuries to household members. If you witness consistently unsafe practices, bring it to the project lead's attention immediately. If the issue persists, escalate it to the contractor's management. You have a right to a safe work environment on your property.
Deviations from Contract
Any deviation from the agreed-upon contract is a major red flag. This could include using different window models or brands than specified, altering the installation method without your consent, or failing to complete all aspects of the scope of work. For example, if your contract specifies full-frame replacement and the crew appears to be doing a pocket installation without prior discussion and a change order, that's a problem. Always refer back to your contract. If you suspect a deviation, immediately halt work on that specific item and discuss it with the project lead. Do not allow work to proceed on the disputed item until a clear resolution is reached and documented, ideally with a formal change order if the scope of work is indeed being altered.
Another critical red flag, especially for older homes, is if the contractor fails to implement lead-safe work practices when disturbing painted surfaces in a pre-1978 home. This is a violation of federal regulations and poses a serious health risk (EPA RRP Program). If you observe this, stop work immediately and contact the contractor's management and, if necessary, the appropriate regulatory bodies.
Finally, be wary of contractors who demand large cash payments, pressure you to sign documents you haven't read, or refuse to provide a written contract or lien waivers. These are common tactics used in home improvement scams (FTC Home Improvement Scams).
Worked Example: Addressing a Minor Discrepancy
Even with the best planning, minor issues can arise. Here’s a modest example of how a homeowner might handle a small discrepancy during installation day without involving invented market prices.
Scenario: You are having five new double-hung windows installed. During your initial check with the project lead, you notice that one of the new windows designated for the living room appears to have a different type of lock mechanism than the other four, which all match the sample you approved and the specification in your contract. The difference is subtle but noticeable to you.
Homeowner Action:
- Immediate Observation: You politely stop the project lead before the window is fully installed.
- Clear Communication: You say, "Excuse me, I just noticed that the lock on this window for the living room looks different from the others, and from the one we discussed. Can you confirm this is the correct unit for this opening?"
- Referencing Documentation: You might have your contract or the window order sheet handy. You point to the specification for the lock type.
- Contractor's Response: The project lead examines the window. They might realize it was a mix-up from the warehouse, or perhaps a different model was inadvertently sent. They might say, "You're right, it looks like this one has a different lock. Let me check our inventory on the truck."
- Resolution:
- Ideal Outcome: The project lead finds the correct window on the truck, or confirms they have another unit with the correct lock. They swap it out before installation proceeds.
- Alternative Outcome (if no immediate replacement): The project lead informs you they don't have the correct one on site. They propose: "We can install this one today to keep the project moving and secure your home, and we'll order the correct sash with the right lock mechanism. We'll return to swap just the sash when it arrives, at no additional cost to you."
- Homeowner Decision & Documentation:
- If the ideal outcome, you thank them and allow work to proceed.
- If the alternative, you consider if you are comfortable with a temporary solution. If so, you request written confirmation (an email or a note on the work order) detailing the plan for the replacement sash, including an estimated timeline. You agree to proceed with the understanding that the correct part will be installed later. You also confirm that final payment for that specific window will be contingent on the correct sash being installed.
This example demonstrates how a homeowner can identify an issue, communicate it effectively, reference their documentation, and work towards a resolution, ensuring the final product matches their expectations without resorting to conflict or unnecessary delays.
Closeout and Record Keeping: Securing Your Investment
The project isn't truly complete until all administrative tasks are finalized and you have a comprehensive record of the work. This final stage is crucial for warranty claims, future maintenance, and potential resale of your home.
Final Payments and Lien Waivers
Before making your final payment, ensure all work outlined in the contract has been completed to your satisfaction, including any punch list items identified during the final walkthrough. Confirm that all debris has been removed and the site is clean. Upon final payment, request a lien waiver from your contractor. A lien waiver is a document from the contractor (and potentially their subcontractors and suppliers) stating that they have been paid in full for their work and materials and waive their right to place a mechanic's lien on your property. This protects you from future claims against your home if the contractor fails to pay their own suppliers or workers. Verify local requirements for lien waivers, as they can vary.
Warranty and Maintenance Information
Obtain all warranty documentation for your new windows. This typically includes a manufacturer's warranty for the windows themselves (covering glass, frames, and hardware) and a separate warranty from the installer for their workmanship. Understand what each warranty covers, its duration, and the process for making a claim. Ask for any specific maintenance instructions for your new windows, such as cleaning recommendations or lubrication for moving parts. Proper maintenance can extend the life and performance of your windows and keep your warranties valid.
Building Your Home Improvement File
Create a dedicated file for your window installation project. This file should contain:
- Your signed contract and all change orders.
- Copies of all invoices and payment receipts.
- All warranty documents (manufacturer and installer).
- Maintenance instructions.
- Photos taken before, during, and after the installation.
- Notes from all significant communications with the contractor.
- Lien waivers.
- Any permits obtained for the work (verify local permit requirements).
Frequently Asked Questions (FAQs)
Q1: How much access space do installers typically need around each window?
Installers generally need at least three to five feet of clear space around each window, both inside and outside. This allows them to safely maneuver tools, new windows, and remove old ones without obstruction. More space is always better for efficiency and to prevent accidental damage to your belongings or landscaping.
Q2: Should I be present during the entire installation process?
While it's not strictly necessary to be present for every minute, it is highly recommended to be available, especially during the initial setup and the final walkthrough. Being on-site for these critical junctures allows you to confirm plans, address immediate concerns, and ensure satisfaction with the completed work. During the main installation, periodic check-ins are usually sufficient.
Q3: What if the crew damages something during installation?
If damage occurs, immediately bring it to the attention of the project lead. Document the damage with photos and notes. Your contract should outline how such incidents are handled. Reputable contractors carry insurance to cover accidental damage. Ensure the contractor commits to repairing or replacing the damaged item to your satisfaction, and get this commitment in writing if possible.
Q4: How long does a typical window installation take?
The duration varies significantly based on the number of windows, their size and type, the complexity of the installation (e.g., full-frame vs. insert replacement), and the crew size. A single window might take a few hours, while an entire house could take several days or even a week. Your contractor should provide an estimated timeline in your contract or during initial discussions. Always factor in potential delays due to unforeseen issues or weather.
Q5: What should I do if I suspect lead paint is present?
If your home was built before 1978, assume lead-based paint is present on painted surfaces. Discuss this with your contractor before work begins. Ensure they are certified in EPA's Lead-Safe Renovation, Repair, and Painting (RRP) program and will follow lead-safe work practices. These practices include containment, minimizing dust, and proper cleanup and waste disposal (EPA RRP Program). Do not attempt to disturb painted surfaces yourself if you suspect lead paint.
Q6: What's the difference between a full-frame replacement and an insert replacement?
A full-frame replacement involves removing the entire existing window, including the frame, sills, and trim, down to the rough opening. This allows for inspection of the rough opening for rot or damage and typically provides the largest possible glass area for the new window. An insert replacement (also known as a "pocket replacement") involves installing a new window unit directly into the existing window frame, leaving the old frame, sill, and exterior trim intact. This is generally less invasive and quicker but results in a slightly smaller glass area for the new window. The choice depends on the condition of your existing frames and your desired outcome, and should be clearly specified in your contract (Energy.gov Window Installation Guide).
This guide organizes a project conversation. It is not engineering, legal, code or trade advice. Property conditions and local requirements must be verified by qualified professionals.